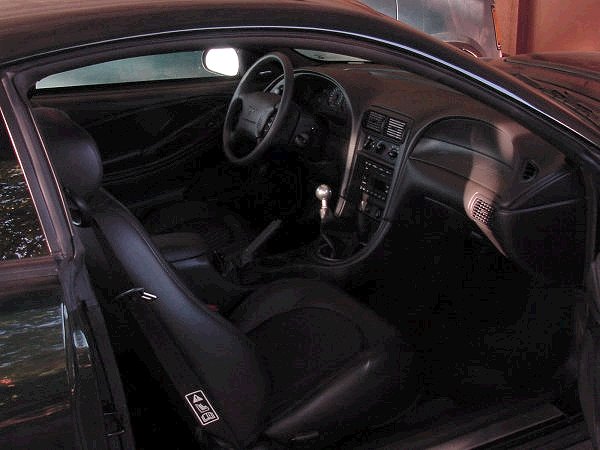
BULLITT Steeda tri-Ax Shifter Installation
  Home    

Steeda tri-Ax Shifter Installation

Here are some pics of my Steeda Tri-Ax Installation.
This is the Factory Shifter and knob in First gear.

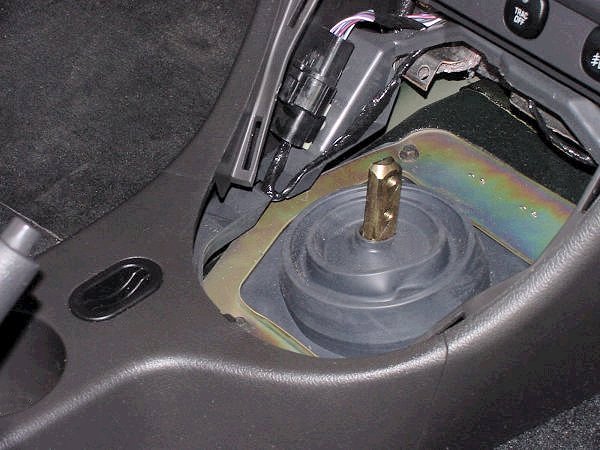
This is the Factory Shifter and knob in Second gear.

Stop by American Muscle if you are looking for a new Mustang shifter for your Bullitt, including Steeda Tri-ax shifters and Pro 5.0 shifters.

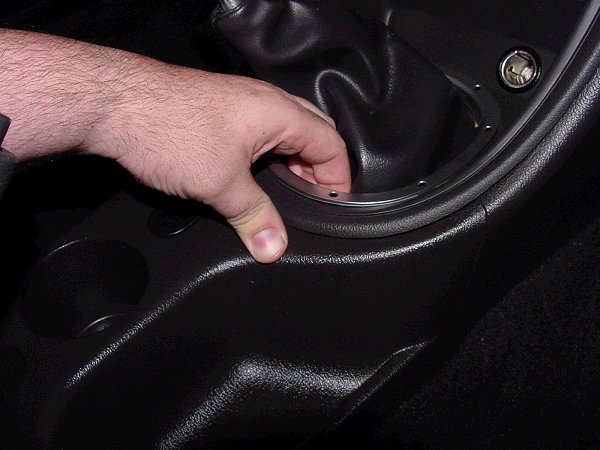
1. Remove the shifter knob

2. Grip the plastic chrome at the rear where the boot meets and pull up slightly about 1/4 inch.

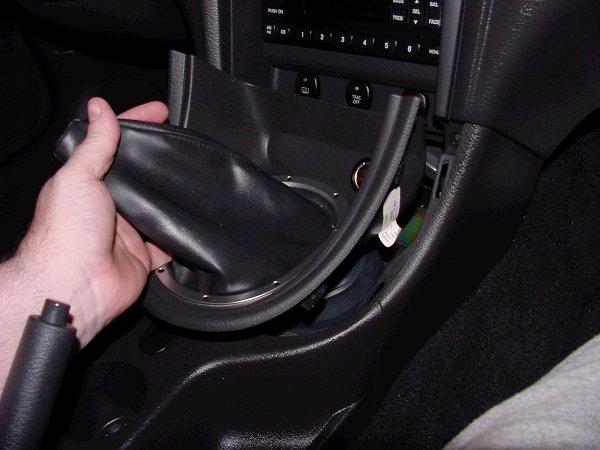
3. Once this pops up, then you can pull the entire trim piece straight back (like towards the dome light) This trim is held in by four compression clips. Make sure they stay with the trim that you are removing and not fall out.

4. Disconnect the lighter, the entire plug rotates so it is easy to find the latch on the connector to release.

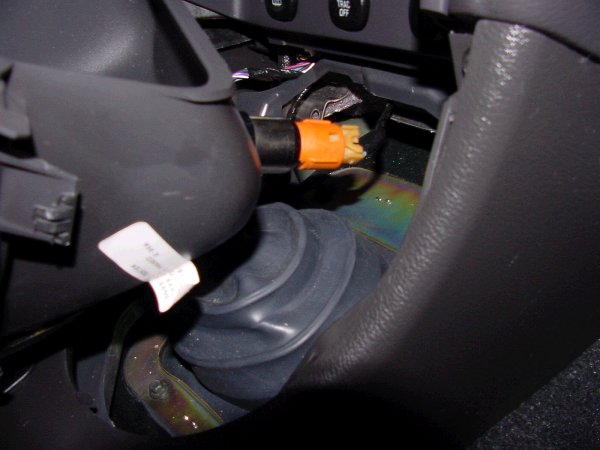
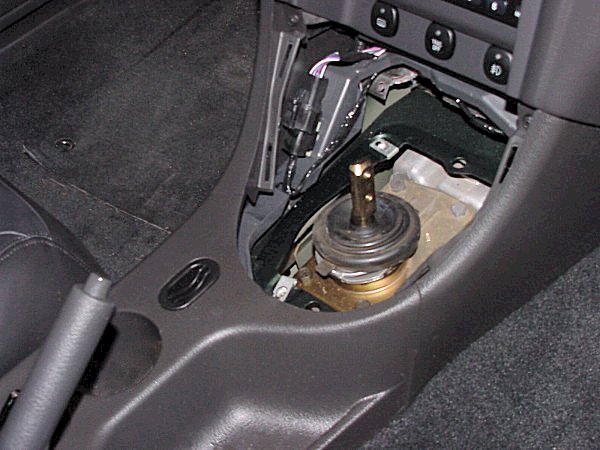
5. Set the trim someplace where the helpful neighbor will not set on it while you are not watching.

6. Remove the four bolts that secure the dust boot assembly.

7. Remove the four bolts holding down the factory shifter.

8. Lift the factory shifter out. There may be some ATF on the bottom of the shifter so have a rag ready as you remove it.

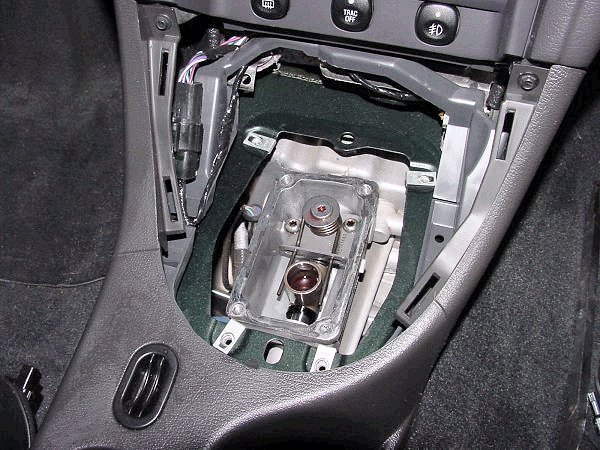
9. Remove the factory sealant around the shifter housing. I just used a razor blade.

10. Pull the plastic cap off the factory shifter and transfer it to the Tri-Ax. IF the cap is NOT on the shifter then look inside the transmission.

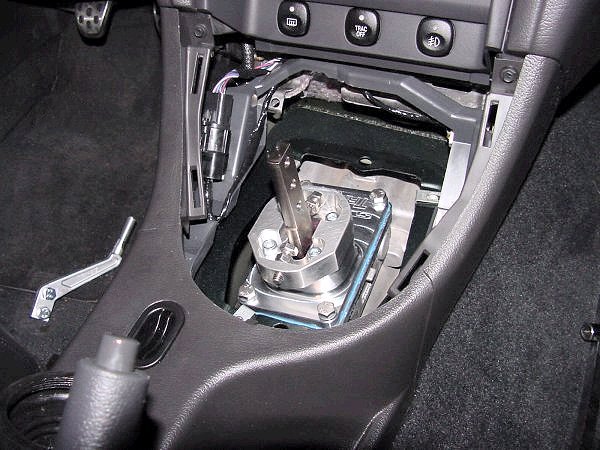
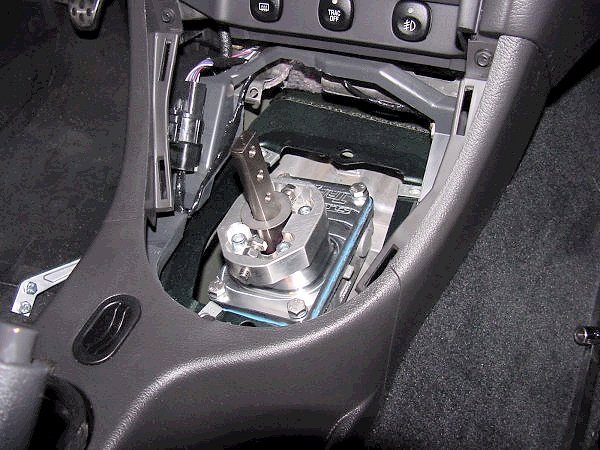
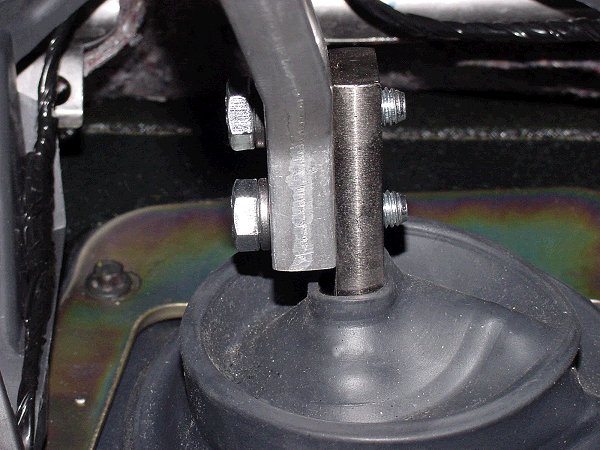
11. Put down a small bead of gasket sealant around the shifter housing and mount the shifter in place using the four new bolts that came with the shifter.

NOTE: This is where you would normally adjust the shift stop. However Tremec has released the following message.

NOTE:From Tremec dated 03/01

Tremec Transmissions
Service Bulletin 03.01

Subject:
After market Shifter Stops

Transmission Models Affected:
All
Severe damage may be caused by installing an after market shifter with "shift stops" on any TREMEC transmission. All TREMEC transmissions are designed and manufactured with built-in shift stops to prevent over shifting. Therefore; shift stops on after market shifters are totally unnecessary when used on a TREMEC transmission. TREMEC "TR series" transmissions have multiple shift rails with shift stops on the gearing. TREMEC "T series" transmissions have a single shift rail system with stops built into the guide plate.

When installing an after market shifter on a TREMEC transmission it is best to remove the shift stops to avoid miss adjustment, and the potential of the screws vibrating lose. A misadjusted shift stop can cause an under-shift, which may lead to a gear jump-out situation. If the transmission jumps out of gear, the shift fork can be bent causing permanent damage to the transmission. Shift forks can also be damaged by "clash shifting". A clash is caused by a missed shift.

Neither an "under-shift", nor a "clash shift" can be prevented by shift stops. TREMEC shift forks are designed to take loads up to 1,000 lbs. However, a gear jump-out may well exceed 1,000 lbs. of force, which may result in a permanently damaged transmission.

I removed mine.


11. Install the big washer around the shifter, this is supposed to protect the boot from getting caught in the shifter.

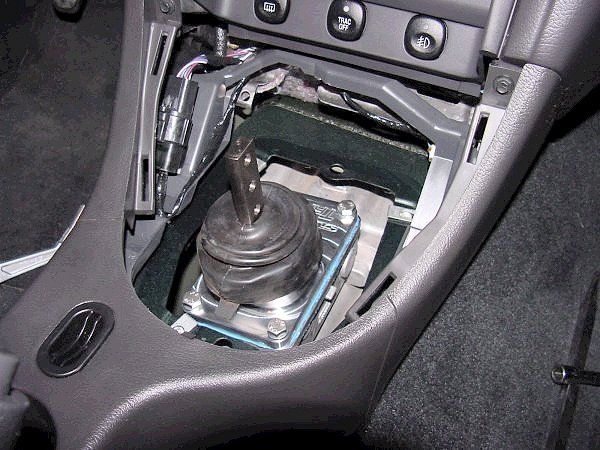
12. Replace the small boot over the new shifter.

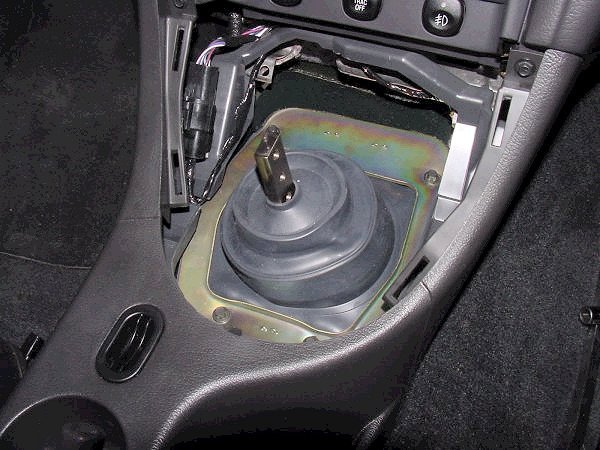
13. Replace the large boot

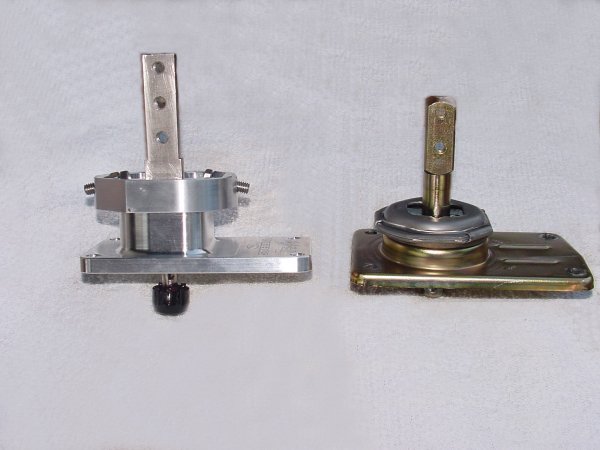
14. Your choice here to use the top position or the bottom position for mounting the shifter handle.

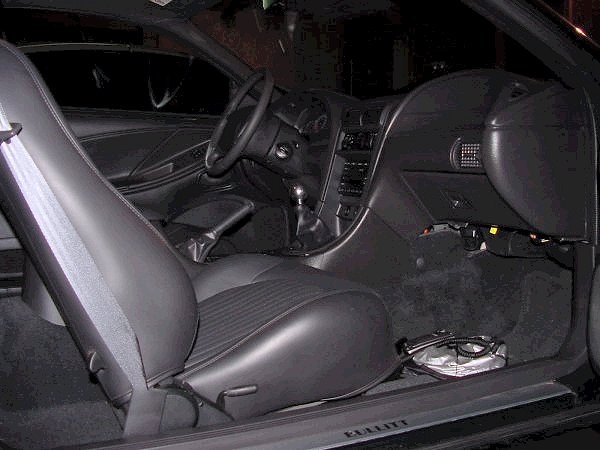
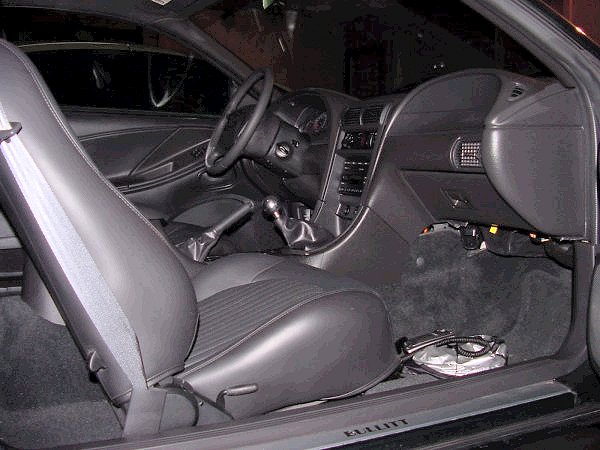
15. Tighten the bolts down.

16. Replace the trim ring and boot, don't forget to let the neighbor help, let him hand it to you. Connect the lighter power then simply align up the tabs and push it straight in. It will pop into place.

17. Screw the knob on.

New Shifter and Knob in First gear

New Shifter and Knob in Second gear

Done!

Torque values.
2 shift lever bolts 27 lb-ft
4 inner boot bolts 89 inch pounds
4 shifter bolts 13 lb-ft


Below are the instructions that come with the Tri-Ax

Steeda Tri-Ax Shifter
Installation Instructions
T-5, T-45, TR 3650 and T-56 transmissions

Note 1986 and earlier cars require removal of the center console to install the shifter. Consult a shop manual for this procedure. All other cars follow the procedure below.

1. Unscrew the shift knob and remove the shift boot and console cover plate assembly. (Push your fingers into the boot, hook your fingers under console plate and lift up).

2. Remove the factory shift handle with a 10mm wrench

3. Remove the four bolts (8mm) holding the inner rubber shift boot plate and remove the boot.

4. Remove the four bolts (13mm) holding the factory shifter to the transmission. Remove the shifter from the transmission. You may have to pry the shifter from the transmission because the adhesive sealant bonds the shifter to it. A quick blow to the base with a block of wood will break the shifter free without damaging it.

5.

a.T-5, T-45, T-56 and SROD Transmissions (1989 to 2001-1/2 Mustang): Make sure the plastic bushing is still in the transmission where the shift lever moves the gear selector. If it is not there, look for on the end of the shifter, as sometimes it comes out with the stock shifter

b.TR-3650 Transmission (2001-1/2 and newer Mustang): Transfer the plastic bushing from the end the factory shifter to the new shifter. Pry it off with a screwdriver and snap it onto the Tri-Ax shifter.

6. Scrape any remaining gasket material off the transmission and clean off any oil or dirt.

7. Make sure the plastic bushing is still in the transmission or on the end of the shifter (See step 5).

8. Apply a thin bead of silicone gasket maker on the transmission mounting surface.

9. Install the new shifter using the new bolts provided (8mm X 1.25 X 25mm long stainless steel) Don't reuse the factory bolts, they are too short for the new shifter.

10.SET THE SHIFTER STOPS as follows:

a. Back off the stop bolts so that the shifter moves freely into all gears.
b. Place the shifter in third gear and thread the stop bolt towards the shift lever by hand until it contacts the shift lever.
c. Once the stop bolt contacts the shift lever, back off the bolt ¼ to ½ turn, until there is a small air gap (about .020") between the shifter lever and the stop.
d. Hold the bolt with a ½" wrench while tightening the jam nut against the shifter tower with another wrench
e. Double-check the space between the shift lever and the stop bolt. When you pull hard on the shift lever it should barely contact the stop bolt, but when you let go of the lever it should not touch the bolt, but have a small air gape between them.,
f. Place the shifter in second gear and adjust the other stop bolt.
g. Shift the shifter through all gears and double check the stop clearance in each gear. The shifter must be able to shift freely into all gears and rest in gear without interference from the stop bolts.

Important: Whenever the shifter is removed from the transmission the stop bolts must be reset when the shifter is reinstalled.

11.Place the BootGuard washer over the shift lever (The large washer slips over the top of the lever and slides down until it sets on the "step" in the lever.)

12.Place the inner shift boot over the shift lever until it resets on the BootGuard. (This is the rubber boot which bolts to the transmission tunnel, not the rubber boot, which was attached to the factory shifter.) Reinstall the inner boot with the four factory bolts.

13.Install the new shift handle at the desired position with the two bolts (8mm X 25mm long) and lock washer provided. Tighten bolts securely with a wrench. Install the handle in the higher position for the greatest driver comfort. Install the handle in the lower position for the shortest throw.

14.Install the console cover plate, shift boot and knob. Important: Always use an anti-seize compound on the threads when installing an aluminum shift knob onto the Steeda shift handle.

NOTE: Because the Tri-Ax shifter eliminates the factory rubber noise isolators (as do all high performance shifters) you will hear more gear noise or "gear whine" from the transmission once the shifter is installed. This noise is normal, and comes from the transmission, not the shifter. The vibrations that cause the noise are always present, but are hidden by rubber isolators in the original shifter and shift handle. The isolators which absorb the noise are also partly responsible for the sloppy, rubbery feeling of the stock shifter, so it is necessary to eliminate them for a a performance shifter.

Some of this noise ban be eliminated by removing the rubber booty from the original shifter and stretching it over the top of the new shifter (after the stops have been set and the BootGuard washer installed).

IMPORTANT! T-56 TRANSMISSIONS ONLY: The reverse lookout solenoid on the transmission must be wired to a 12 volt switch to allow you to engage reverse gear. Do not attempt to force the transmission into reverse. Once the reverse lockout is disengaged the shifter should go into reverse easily. Contact your transmission supplier if you need more information about the reverse lock out switch.


©2010BULLITT Archive